I was feeling a little more inspired this week for two reasons, the colors were more up my alley and no restrictions on the stamp set! I submitted one card for the challenge – but created a few more also - I loved this color combo! - Oh! and I even won the random prize drawing for this week! I got some several rolls of washi tape!!
Here is week #2's inspiration:

The Stampin' Up! colors identified were:
- Any Green
- Sahara Sand
- Basic Black
- Whisper White
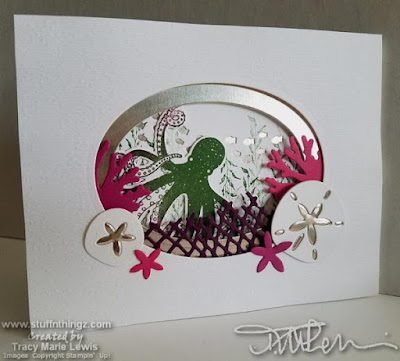
Here is my submission:

Dragonfly
I stamped the green polka dots first before running through the star embossing folder.
After stamping the dragonfly, I used a combination of the Always Artichoke and the Garden Green – just making random splat pattern on the wings with a blender pen. Then topped the wings off with clear Wink of Stella. I repeated this on the envelope.
I cut the frames out by hand with an Exacto knife – but you could use nesting square dies as well.
I stamped the sentiment with VersaMark Embossing ink, topped with white embossing powder and heat set. The sentiment is popped up for extra dimension.
Supplies:
- Always Artichoke Ink & Cardstock
- Cucumber Crush Ink & Cardstock
- Whisper White Cardstock
- Basic Black Cardstock
- Memento Black Ink
- Swirly Scribbles Thinlits Dies
- Dragonfly Dreams Stamp Set
- Stars Embossing Folder
- Wink of Stella – Clear
- Silver Glimmer Paper
- Blender Pens
- Pop Dots / Dimensionals
Shop Stampin' Up! products here!
Baking Makes Life Sweeter

I stamped the lime green gloves on a slightly smaller piece of Cardstock than the card front. I glued it in place, then traced around the edge with a fine black pen.
Stamped the spatula, mixing bowl & eggs with VersaMark embossing ink & added white embossing powder & heat set. I then fussy-cut those three items.
Stamped the sentiment, then added the background swash in lime green (stamped off), then I used the circle dies to cut out the sentiment.
**TIP: I use repositionable tape to tape my die to the paper so I get an exact cut that I want – I have found that the magnetic places tend to shift – especially when your cutting plates get well-worn & start to bend.
Matching envelope was made with Blender pens.
Supplies:
- Cucumber Crush Cardstock
- Whisper White Cardstock
- Basic Black Cardstock
- Memento Black Ink
- Lemon Lime Twist Ink & Cardstock
- Perfect Mix Stamp Set
- Swirly Scribbles Thinlits Dies
- Work Of Art Stamp Set
- Circle Dies
- VersaMark Embossing ink
- White Embossing Powder
- Wink of Stella – Clear
- Blender Pens
- Pop Dots / Dimensionals
Shop Stampin' Up! products here!
Thanks a Bunch

First, I stamped & cut out a bunch of flowers and the basket. Then I placed them in the general area that I thought I wanted the foreground flowers to be. Then I carefully picked up 1 or 2 of the flowers and stamped the background flower I wanted. Then repeated the process with the stems and leaves.
The flowers were colored with Crayola markers and the leaves were colored with blender pens and inkpads.
The foreground flowers were popped up with Dimensionals.
The tips of flowers were highlighted with Wink of Stella markers. And the entire butterfly as well.
The thanks a bunch stamp came in one line – but I wanted a stacked sentiment – so I added ink carefully to the "thanks a" and stamped and repeated for the "bunch".
I added washi tape for the polka dot borders.
Don't forget to add small dots around the bouquet with a green pen.
Supplies:
- Cucumber Crush Ink & Cardstock
- Whisper White Cardstock
- Basic Black Cardstock
- Memento Black Ink
- Daffodil Delight Ink
- Rust, Yellow, Dark Yellow and Green Crayola Markers
- Basket Bunch Stamp Set
- Basket Builder Framelits Dies
- Tiny Butterfly Dies
- Polka Dot Washi Tape
- Wink of Stella – Clear
- Blender Pens
- Pop Dots / Dimensionals
Shop Stampin' Up! products here!
Paisley Thanks

I randomly stamped the paisleys to create a background.
The leaves were die cut – but the background black was fussy cut to pop them off the paisley background.
Supplies:
- Always Artichoke Ink
- Cucumber Crush Ink & Cardstock
- Whisper White
- Basic Black Cardstock
- Memento Ink
- Lemon Lime Twist Ink & Cardstock
- Paisleys & Posies Stamp Set
- Paisley Framelits Dies
- White Twine
- Glue Dots
- Pop Dots / Dimensionals
Shop Stampin' Up! products here!
Collection:
Here are all the cards for this color challenge that I made.

Here are the group results as well:
If you are interested in playing along – see Shannon's blog:
www.creatingforgrace.com
~Enjoy!
*Most products used were Stampin' Up!, but occasionally other sources as well