Showing posts with label Itty Bitty Birthdays. Show all posts

Sunday, June 28, 2020

NC Demos Blog Hop June 2020

Welcome to the NC Demos Blog Hop for June 2020!

For this months blog hop the theme is Something Old, Something New, Something Borrowed and Something Blue.

~Enjoy!


I had a digital craft day with my sister Jane who lives in Florida & my best crafting buddy Tracy who lives in Washington. Since I live in North Carolina I could not exactly borrow from them. We decided to try the Braided Fold Card inspired by barbstamps.com, a card Maggie Trimble sent me as well as an item from Pinterest, so I think this qualifies me to check the box for Something Borrowed!

For something new, I used the new In-Color of Magenta Madness even though it really is indistinguishable from the Blackberry Bliss I used to sponge the background with some Mango Melody and Pretty Peacock. The Braid Fold is also new to me. We always try to do new techniques when we get together to keep it fun. Something New...Check!

For Something Old, I used the Bokeh technique which my sister has never done on top of my sponged background as well as the Christmas Layers Dies cut with Gold Foil Paper and Gold 3/8" Metallic-Edge Ribbon. The sentiment is from Itty Bitty Christmas. Three out of four... on to Something Blue!

For something blue, I had the card all set up to use the Pretty Peacock as the card base but at the last minute I switched it out for a Blackberry Bliss one, so the sponged background will have to count for my something blue.

This card is spectacular in person! 


Make sure to check out these other amazing projects!!

Tina Lesson
Toni Campana
Jo Anne Hewins
Ariel Matera
Laurie Meier
Amy Kinler
Tracy Lewis
Sue Root
Tracie Evans Langley
Libby Foreman <- You are here


Martinette Horner

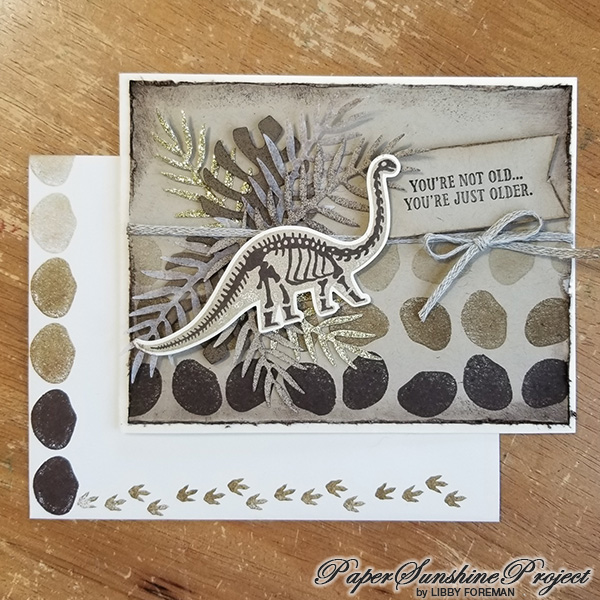
Before you go, here is a bonus card with my "discarded" Pretty Peacock base from above! This uses a piece of the retired Perennial Essence DSP, that I loved but never got around to using. It is layered with a sentiment heat embossed with Itty Bitty Birthdays and the butterflies are from the Butterfly Beauties Dies, cut with Gold Glimmer Paper and Vellum. The envelope is stamped with the Beauty Abounds Stamp Set. Thanks for stopping by!


Stampin' Up! products used:
  • Beauty Abounds Stamp Set
  • Itty Bitty Christmas Stamp Set
  • Itty Bitty Birthdays Stamp Set
  • Christmas Layers Dies
  • Butterfly Beauties Dies
  • Perennial Essence DSP
  • Gold Glimmer Paper
  • Gold Foil Paper
  • Gold 3/8" Metallic-Edge Ribbon
  • Vellum
  • Magenta Madness
  • Blackberry Bliss
  • Mango Melody
  • Pretty Peacock
Shop Stampin' Up! products here!


Saturday, May 30, 2020

Side Panel Layouts 3 Ways

On our May digital play date with Tracy & Jane, we picked a layout and applied 3 different applications with the same color choices - I love how these turned out and bonus: quick & simple cards with a wow effect!

~Enjoy!


First up, a shout out to my favorite designer from whom this card was CASEd from Pinterest: Tammy Wilson. She makes the most beautiful cards! For this sample she used Label me bold. Tracy was the only one to have this stamp set, so the rest of us improvised.

We also picked a color challenge of Pretty Peacock, Rich Razzleberry and Mango Melody. For this first card, I used some diamond stamps from my stash (Grunge Rock would work for this too) and gave it a light spritzing with water to blur the pattern a little more. I mounted the stamped strip on Rich Razzleberry card stock and then on Whisper White that was embossed with the Subtle Embossing Folder. I stamped the sentiment from Itty Bitty Birthdays on Basic Black cardstock and VersaMark and heat embossed it with White Stampin' Emboss Powder. I trimmed the sentiment in Whisper White to give it the negative affect of the original card. I also added a little Silver Glimmer Paper, because, duh, birthday cards need a little pizzazz! I finished the whole thing off with some Whisper White 1/4" Crinkled Seam Binding Ribbon and just a few Rhinestone Basic Jewels.


For this card I used the dots from the Timeless Textures Stamp Set and it is mounted on pretty Peacock and Whisper White that was embossed with the Parisian Flourish 3D Embossing Folder (I love this one!) The sentiment is form my stash with all of the same steps as above.


Lastly, one of my favorite quick & easy backgrounds is the swish! To make the background, I dragged each color across a piece of Whisper White cardstock. Hold the ink pad so that only the top edge hits the paper then quickly drag the pad across the paper back & forth in a diagonal. The trick here is not to press too hard, take a running start at your paper and do it really fast. For this one I used the the Tasteful Textiles 3D Embossing Folder and a little Whisper White Bakers Twine as my finishing touch.


Stampin' Up! products used:
  • Itty Bitty Birthdays Stamp Set
  • Timeless Textures Stamp Set
  • Subtle Embossing Folder
  • Parisian Flourish 3D Embossing Folder
  • Tasteful Textiles 3D Embossing Folder
  • VersaMark
  • White Stampin' Emboss Powder
  • Whisper White 1/4" Crinkled Seam Binding Ribbon
  • Whisper White Bakers Twine 
  • Silver Glimmer Paper
  • Rhinestone Basic Jewels
  • Pretty Peacock
  • Rich Razzleberry
  • Mango Melody
  • Whisper White
  • Basic Black
Shop Stampin' Up! products here!


Sunday, August 4, 2019

4th of July - #simplestamping

One more #simplestamping idea I had to get out of my head, maybe since the 4th of july just passed and it was America's birthday!

~Enjoy!


This flag is created with Pacific Point and Real Red and the sentiment is again from Itty Bitty Birthdays. Although cute on its own, it was time to dress it up!


As I started to build this card up, it was still not feeling right to me, so I decided it needed some grunge lovin'. I tore up the edges with my scissors, and added Early Espresso ink. I covered up the sentiment with a piece of paper & ran the whole flag through with the Subtle Embossing Folder. The stars are cut from Pacific Point and the retired Confetti Stars Border Punch, that piece is then layered over Silver Glimmer Paper for a little sparkle - what is 4th of July without sparkle? The banner is hand cut and edged in the same ways the card base is done and the whole thing is topped with the Night of Navy / Sahara Sand Baker's Twine. I really like how this one came out!


Stampin' Up! products used:
  • Very Versailles Stamp Set
  • Itty Bitty Birthdays
  • Confetti Stars Border Punch
  • Silver Glimmer Paper
  • Night of Navy / Sahara Sand Baker's Twine
  • Pacific Point
  • Real Red
  • Early Espresso
  • Whisper White
Shop Stampin' Up! products here!


Basket Bunch - #simplestamping

This little #simplestamping card came out really bright! These little shapes from the center part of the baroque frame from Very Versailles made cute little jelly beans or wonky eggs. So an Easter card was born!

~Enjoy!


Sentiment is from the Itty Bitty Birthdays stamp set. The colors used are Coastal Cabana, Rococo Rose, Pineapple Punch, Granny Apple Green and Highland Heather.


First things first, I had to soften the overall appearance of the card, a layer of vellum was just the thing! I pulled out my retired Easter sets of Best Bunny Stamp Set, Bunny Builder Punch and the Basket Builder Framelits. The basket is cut form Crumb Cake and Soft Suede. The eggs are cut from Pineapple Punch and Daffodil Delight for the yellow egg. Rococo Rose and Blushing Bride for the pink egg. Granny Apple Green and Old Olive for the green egg. I popped up the sentiment from Itty Bitty Birthdays stamp set, free cut the banner, edge it with scissors and added a little Highland Heather around the edges. Topping it all off is a sweet little polka dot bow made from the Polk Dot Tulle Ribbon. Super Cute!!!


Stampin' Up! products used:
  • Very Versailles Stamp Set
  • Itty Bitty Birthdays Stamp Set
  • Best Bunny Stamp Set
  • Bunny Builder Punch
  • Basket Builder Framelits
  • Polk Dot Tulle Ribbon
  • Coastal Cabana
  • Rococo Rose
  • Pineapple Punch
  • Granny Apple Green
  • Highland Heather
  • Daffodil Delight
  • Blushing Bride
  • Old Olive
  • Whisper White
Shop Stampin' Up! products here!


No Bones About It - #simplestamping

I really struggle with the Stampin' Up!s #simplestamping concept, I am a true blue #avidcrafter at heart. Here are the #simplestamping cards using the center part of the baroque frame from Very Versailles all dressed up!

~Enjoy!


So these shapes made me think of rocks which made me think of Dinosaurs. Stampin' Up! has a new set of dinos called Dino Days that would be really cute on this card or maybe even some coffee cups from past sets. I decided to go with Dinosaurs since I made the decision with the sentiment and decide to go just a little snarky for my card.


I pulled out my retired dino set called No Bones About It. I have only used this set once or twice, but just love it! My dino was stamped with Early Espresso and Sahara Sand. The leaves are Tropical Dies and cut with Gold Glimmer paper, Soft Suede, Crumb Cake and Vellum. The leaves are softly sponged with more Soft Suede to give them a little texture. The edge of the card and the sentiment are scruffed with scissors and edged with more ink. Braided Linen Trim adds the final touch. I think this turned out super cute for the perfect friend you would like to tease a little about their age or for a boy and change the sentiment.


Stampin' Up! products used:
  • Very Versailles Stamp Set
  • Itty Bitty Birthdays Stamp Set
  • No Bones About It
  • Tropical Dies
  • Gold Glimmer Paper
  • Braided Linen Trim
  • Early Espresso
  • Soft Suede
  • Sahara Sand
  • Crumb Cake
  • Very Vanilla Cardstock
Shop Stampin' Up! products here!


Very Versailles Collection - #simplestamping

Here is the collection of #simplestamping cards and the #avidstamper results!

~Enjoy!


Stampin' Up! products used:
  • Very Versailles Stamp Set
  • Itty Bitty Birthdays
  • No Bones About It
  • Tropical Dies
  • Best Bunny Stamp Set
  • Bunny Builder Punch
  • Basket Builder Framelits
  • Magnolia Blooms Stamp Set
  • Hello Cupcake Stamp Set
  • Sea of Textures Stamp Set
  • Up & Away Thinlits
Shop Stampin' Up! products here!


Very Versailles Red Rubber Alternatives - #simplestamping

While I was crafting with my friend Tracy, I asked her is she happened to keep the little piece of red rubber that was inside the baroque frame in the Very Versailles stamp set. She asked me what I was going to do with it and I told her #simplestamping or course. You may have seen other ideas where the dot was used for cow spots, but since I don't have the cow set I have to come up with some other fun creations!

For me, #simplestamping is ink, stamps and paper. The one thing I have to have is a single layer even if it is white on white. It just adds so much to the card.

~Enjoy!


This first card, I was not really sure where I was going with it, I was just adding ink to paper. As I got done it reminded me of rocks. This month's Stampin' Up! #simplestamping challenge was for Birthdays, so I dug out my Itty Bitty Birthdays & found this sentiment. Everytime I ready it, I read it as an age jab not as it is written. So when I saw these brown "rocks" I thought this was cute like you are older than dirt. I eventually used this card base to create a dinosaur card. It also reminded me of coffee beans & I may circle back and make a coffee card out of it. The colors for this card are Early Espresso, Soft Suede and Sahara Sand stamped on Crumb Cake.


I wanted to create one with lots of colors, but this one turned out really bright!!! The shapes can be eggs or jelly beans, so it became more of an Easter card than anything else. I added a strip of removable tape across the bottom to mask off a strip for the sentiment & then just stamped away! Sentiment is from the Itty Bitty Birthdays stamp set. The colors used are Coastal Cabana, Rococo Rose, Pineapple Punch, Granny Apple Green and Highland Heather.


Again, no real direction with this card, just wanted to have an ombre color effect. The shapes reminded me of rose petals and I thought that is where the #avidstamper card would end up, but I do not care too much for rose stamps so I did not have a great selection to choose from, so it ended up somewhere completely unexpected! The Sentiment is from the Magnolia Blooms set and the colors are Merry Merlot, Rococo Rose and retired Powder Pink.


As I was doing the ones above, I kept seeing a path. Since I already did the brown ones, I thought that this would be cute in yellow, as a yellow brick road. I needed a sentiment that built upon my Oz theme and found this one in the Sea of Textures set. The hearts on the envelope are from Celebrate with Cake. The colors used are So Saffron, Daffodil Delight and Mango Melody.


One more idea I had to get out of my head, maybe since the 4th of july just passed and it was America's birthday! This flag is created with Pacific Point and Real Red and the sentiment is again from Itty Bitty Birthdays.


The collection


Stampin' Up! products used:
  • Very Versailles Stamp Set
  • Itty Bitty Birthdays Stamp Set
  • Magnolia Blooms Stamp Set
  • Sea of Textures Stamp Set
  • Celebrate with Cake Stamp Set
  • Whisper White Cardstock
  • Early Espresso
  • Soft Suede
  • Sahara Sand
  • Crumb Cake
  • Coastal Cabana
  • Rococo Rose
  • Pineapple Punch
  • Granny Apple Green
  • Highland Heather
  • Merry Merlot
  • Powder Pink
  • So Saffron
  • Daffodil Delight
  • Mango Melody
  • Pacific Point
  • Real Red
Shop Stampin' Up! products here!


Friday, August 2, 2019

Digital Retreat August #4 - Very Versailles - #simplestamping

I am not quite sure what exactly happened with the third card of the Very Versailles / #simplestamping project, or should I say the third and fourth cards. This time we worked on the leaves going across. Maybe it was because we did not have an inspiration for this one, we were just winging it, but I did not like my first attempt at #simplestamping so I made a quick second version which I liked much better. Tracy actually went through 4 versions!

~Enjoy!


This time we used Mossy Meadow, Crumb Cake and Black on Very Vanilla. Here is attempt number one for me. It did not look too bad until I dropped the lid of my Memento Black onto the left edge of the card, so an addition of the baroque stamp came in to play & that is when things really fell off the rails. I added an additional baroque frame to the top left to balance the imagery and then wondered what it would look like to frame the sentiment, well, here is what that looks like.


So I started over again with a little less going on in the bottom right corner and it was feeling better balanced for me. Check out how Tracy's #simplestamping version!


I decided to tackle the horrible version first and threw caution to the wind and just started piling stuff on without a second thought. It was already ruined, how could it get any worse, right? I started off by grunging it up by roughing up the edges with a scissor edge and adding sponged Crumb Cake around the edges. I embossed a piece of vellum with the Scripty 3D Embossing Folder and added a little Crumb Cake to it too.

I had some Glimmer paper from the retired Myths & Magic set and cut a small border to lay behind the Braided Linen Thread and to give it a little sparkle. The sentiment is from the Itty Bitty Birthdays stamp set and it is finished off with 2 leaves from the Bird Ballad Trinkets. Overall a vast improvement and now I love the card. If I changed anything it would be to find a better suited glimmer paper, but I searched through my stash and found nothing better. 


The last card of the day came together fairly quickly, since I decided to grunge the version above, I wanted to leave this version clean and classy. The background was embossed with the Subtle Embossing Folder. The Gold Glimmer Paper really helped this card along and it almost has a Christmas feel to it now. I incorporated a die cut from the Flourish Dies set and used the leftover scrap of vellum from the above card and it is finished with the Gold Metallic Edge Ribbon. Check out how Tracy did her card!


Stampin' Up! products used:
  • Very Versailles stamp set
  • Itty Bitty Birthdays stamp set
  • Flourish Dies
  • Subtle Embossing Folder
  • Scripty 3D Embossing Folder
  • Myths & Magic Glimmer Paper
  • Braided Linen Thread
  • Bird Ballad Trinkets
  • Gold Glimmer Paper
  • Gold Metallic Edge Ribbon
  • Mossy Meadow
  • Crumb Cake
  • Memento Black
  • Very Vanilla
Shop Stampin' Up! products here!


Digital Retreat August #3 - Very Versailles - #simplestamping

For the second card of the Very Versailles / #simplestamping project, we worked on the leaves creeping up. This card was inspired by this card. We loved the dark colors with the delicate background. One small problem, this was a #simplestamping project first and foremost, so we have to really eliminate some items.

~Enjoy!

We kept the balance of colors by choosing Blackberry Bliss, Blushing Bride and Basic Gray all stamped on Whisper White. This one is pretty much CASEd from the background of the inspiration card. and that is where we left it. I think it is very pretty for a #simplestamping card, but I just cannot leave well enough alone!


For the stepped up version, I first embossed the background with the Subtle Embossing Folder. Then I added the vellum leaves as Melissa did, but they just did not stand out enough for me so I decided to go with Silver Glimmer Paper and the Flourish Dies to get something more delicate and not very heavy. We added clear embossing to the background circle with the baroque frame from the set. It is topped off with a hand cut banner & the sentiment from the Itty Bitty Birthdays stamp set. I added some Silver Metallic Thread and topped it off with a Polka Dot Tulle Ribbon knot. The finishing touch is a few sequins from a retired sequin pack in what I think is Sweet Sugarplum. Make sure to check out Tracy's card over at Stuff n Thingz!


Stampin' Up! products used:
  • Very Versailles stamp set
  • Itty Bitty Birthdays stamp set
  • Subtle Embossing Folder
  • Silver Metallic Thread
  • Silver Glimmer Paper
  • Flourish Dies
  • Blackberry Bliss
  • Blushing Bride
  • Basic Gray
  • Whisper White
Shop Stampin' Up! products here!


Wednesday, July 3, 2019

4th of July - Incredible Like You

For the 4th of July this year, there was not a huge selection of stamps from Stampin' Up! So I decided to create a Happy Birthday (America) card instead!

~Enjoy!


This first card is super easy & quick! It uses Real Red and Blueberry Bushel stamped on a white card front. The sentiment is from Itty Bitty Birthdays. The stripes are from Incredible Like You and the "stars" are from Beautiful Bouquet. I wrapped some Clear Tinsel Sparkling Yarn around the center to give it a little shine!


Stampin' Up! products used:
  • Itty Bitty Birthdays Stamp Set
  • Incredible Like You Stamp Set
  • Beautiful Bouquet Stamp Set
  • Real Red
  • Blueberry Bushel
  • Whisper White
Shop Stampin' Up! products here!


Monday, July 1, 2019

4th of July - Flags

This last set was inspired by a previous card I did, but I no longer collect a vast amount of DSP, why should I when I can create my own? So I grabbed a 4x6 piece of Poppy Parade, Real Red, Balmy Blue, Night of Navy, Merry Merlot, Whisper White & Blueberry Bushel and added my own stamps! I trimmed off a piece about 1 inch & cut triangles from that scrapped & mixed and matched to make cute little banners! The sentiment is from a retired SU set.

~Enjoy!


A little creative genius at work - messy!


This one uses a Celebrate stamp from my stash, stamped repeatedly without reinking with Cherry Cobbler on Poppy Parade. Topping it off is Night of Navy Baker's Twine and Silver Mini Sequin Trim. The background is embossed with the Lucky Stars Embossing Folder.


Here I have stamped Night of Navy on Balmy Blue and the Crackle Background stamp. Cherry Cobbler Baker's Twine is added to the Silver Mini Sequin Trim.


On Whisper White, I stamped the flower cluster from Beautiful Bouquet in Night of Navy.


This one again uses the flower cluster from Beautiful Bouquet stamped in Merry Merlot on Read Red.


To switch it up, I embossed this one on Night of Navy with White Embossing Powder and a star banner stamp from my collection. Real Red Baker's Twine tops this one off!


Pacific Point stamped on Whisper white with the dots from Timeless Textures added some whimsey to this one!


Playful Backgrounds stripes are stamped with Real Red on Whisper White.


Night of Navy stamped on Blueberry Bushel and the dots from Playful Backgrounds.


Stampin' Up! products used:
  • Itty Bitty Birthdays Stamp Set
  • Incredible Like You Stamp Set
  • Beautiful Bouquet Stamp Set
  • Playful Backgrounds Stamp Set
  • Crackle Background Stamp
  • Touches of Texture Stamp Set
  • Timeless Textures Stamp Set
  • Lucky Stars Embossing Folder
  • Real Red
  • Blueberry Bushel
  • Balmy Blue
  • Poppy Parade
  • Night of Navy
  • Merry Merlot
  • Whisper White
  • Cherry Cobbler
  • Pacific Point
  • Night of Navy Baker's Twine
  • Whisper White Baker's Twine
  • Real Red Baker's Twine
  • Cherry Cobbler Baker's Twine
  • Silver Mini Sequin Trim
  • White Embossing Powder
Shop Stampin' Up! products here!


Saturday, January 19, 2019

5 January Swaps with Sale-a-Bration!

After making over 400 cards for moving notifications, Halloween, Christmas and New Years, I found myself signed up for more swaps at a recent event, so I created 92 more! Add in the Mad for Plaid series and the January birthday cards, I have made and personally handed out or mailed over 500 cards in the last 3 months! Here are the most recent ones I needed to make for January swaps I signed up for!

~Enjoy


This first card I started by playing with the cute little 4-leaf clover that came in the Amazing Life Stamp Set. I knew I wanted to make a background paper with it, so I went off to select a few of my favorite staple colors. I am so happy that Stampin' Up! brought back Blackberry Bliss, it is one of my all time favorites! Combined with Crumb Cake & Old Olive it is just perfect! Everything is stamped on Whisper White cardstock and matted on an Old Olive card base.

I wanted the background paper to be the star so I just added small strip of Blackberry Bliss embossed with the Swirls & Curls Embossing Folder and added a small hand cut banner tag stamped with the sentiment and Memento Black Ink and then popped up with Dimensionals. A small bow made from Whisper White 1/8" Sheer Ribbon added the finishing touch!


The moment I saw the wavy lines in the Incredible Like You Stamp Set, I knew I wanted to do something with some small skinny candles. Luckily the set also came with a little flame, ok, it is probably a leaf - but I saw a flame! Once I stamped all the candles on Whisper White Cardstock with Poppy Parade Ink and the flames in Daffodil Delight, I contemplated adding the Memento Black Ink sentiment right on top of the candles but thought it would get lost so decided to stamp it on Vellum instead. I think it makes it pop & added a little more dimension to the candles without breaking that they are really tall skinny candles although it almost looks like striped paper also! I added the black bow made from Black 1/8" Cord and then, tragedy struck.

There was this huge empty space at the top of the card & I did not know what to do with. I am not opposed to white space but this one was just too much. This set on my desk for about 2 weeks taunting me.

One day, I was looking for something else for another project & picked up the Wonderful Moments Stamp Set and while I was looking through it I noticed all these little tiny dots, what the heck were those??? WAIT a minute, those would be cute as little sparks above my candles & fill in that gigantic white space!!!!

Note about this card - I made 20 of them & its is really forgiving when it comes to errors, not all my candle are straight, some of the flames do not touch the right candle and I just noticed that one of the flames is actually straddling 2 candles - oops - but see forgiving!!


I love the hibiscus flower from the Humming Along Stamp Set - maybe because they were in my front yard as a child so they have fond memories for me. I am not a colorist by any means, ask my friends Shannon & Tracy. So I wasn't sure what to do about this huge empty outlined flower.

I decided to apply the "swoosh" technique. I started with a piece of Whisper White Cardstock and the Granny Apple Green and Highland Heather Ink pads. You take the open ink pad & hold it at about a 22 degree angle (it is almost flat to the paper, you are really only touching the top edge of the ink pad). Then you drag the edge of the ink pad back & forth, mine is done at even a little diagonal of an angle across the card front. Then I switched colors in the middle of the card. You could do a whole rainbow with the effect, but I wanted the purple for the flower & green for the stem & leaf. No measuring, just eyeballed about half way down & went for it!

Again, I was worried that the flower would disappear in the background so I stamped it on vellum. as well as the sentiment.

Once I layered it on the background, the flower was still not popping enough for me so I decided to back the flower with... a flower! I stamped the flower on Highland Heather Cardstock & the leaf on Granny Apple Green Cardstock & hand fussy cut them out. After some strategic glue dots were applied  to the backside of the vellum, I was pretty happy with the overall result.

Adding the finishing touches were the Daffodil Delight Organdy Ribbon from the Sale-a-Bration catalog and some rhinestones and mounting the whole thing onto Daffodil Delight Cardstock card base.

What I intended to be a simple card kept getting more & more difficult and ended up probably being an avid stamper card.


This card you have seen before but it was actually created with this swap in mind and actually turned out to be the inspiration for my New Years cards (of which I made about 85).

I was trying to be conservative with the paper since I knew I wanted to use this for a swap - so I cut the 6x6 into 4 equal parts. I used the Amazing Life set that everyone got at convention. I love the mixed fonts sets. I used just the top portion of the 3-tiered cake, Swirls & Curls embossing folder, gold glimmer paper and the black 1/8" cord. I gradient-colored the word Cake with the light and dark Daffodil Delight blender pens as well as the cake.


The last card I really wanted to make a masculine birthday card, but had the hardest time deciding on a color combo - see the last image, but finally decided that the green one would be good for the swap.
I got a birthday card from my friend Tracy that really inspired this card. She had a stamp set with multiple birthday & friendship greetings in it & inside she stamped them all and wrote - I couldn't decide which one to use - so I used them all! I thought that was so funny! But it inspired me to use all of the birthday greetings in the Itty Bitty Birthdays Stamp Set. I lined them all up on my Stamparatus on a 45 degree angle (eyeballed it again) and it stamped the cutest little strip which I intended to fishtail & turn into a banner. I positioned all of the stamps really closely together - see the Stamparatus picture below.

I pulled out the Corrugated Embossing Folder - my favorite - and layered the hand cut fish-tailed banner. As I was looking through to find another layer I came across a piece of scrap in Soft Suede that was embossed with the Hexagons Embossing Folder and that was a perfect fit for this masculine card!

I roughed up all of the edges and added a small bow from Braided Linen Trim (can't help myself, its not done if it doesn't have a bow), I tried a knot, but it was knot enough (pun & typo intended).


Shop Stampin' Up! products here!

Wednesday, December 26, 2018

Gingham Gala Plaid Alternatives

Woo hoo - having so much fun altering the Gingham Gala 6x6 paper pack that we all received free at the 30th Stampin' Up! Convention this year! This pack comes with 5 different colors and 2 styles of plaids, a large and a small gingham check.

I recently altered the plaid with a broad stoke black line but wanted to see what others creative ways I could come up with to alter the plaids - here is what I did!

~Enjoy


For the first example - I really wanted to see what this would look like as a not so cute grunge technique. I used the new Home to Roost set for the wheat and stamped the small Grapefruit Grove gingham with Cajun Craze (one of my favorite colors), then sponged edged the gingham with Crumb Cake. The horse is also Cajun Craze and stamped with the Country Road set on Very Vanilla cardstock. The sentiment is from the new Humming Along set and the border from Labels to Love in Crushed Curry and punched with the everyday label punch. I corrugated a piece of Crushed Curry & sponged inked the label, the horse & the corrugated piece as well. I additionally scissor edged the horse and the background Cajun Craze piece. Tying to all together is a piece of 3/16" Braided Linen Trim.


I knew I wanted to try one of the samples with a floral overlay & wanted it to be an open flower - well the new Hello Cupcake set came with the perfect little flower. I made sure to not line up the flowers and tried to create a more random pattern for those trying to duplicate this. I stamped Mango Melody on the Daffodil Delight small gingham and paired that with last weeks large gingham alternative of a thin line added to the large plaid. Using the Color Coach - I picked out the combo of Daffodil Delight, Mango Melody and Poppy Parade (not my favorite - but going to run with it). The bouquet is from Beautiful Bouquet with the flower from Hello Cupcake to tie in the background. Birthday Wishes is from Itty Bitty Birthdays set. Topping it off with a little organdy ribbon from Sale-a-Bration and some rhinestone flower centers!


As I was playing with the card above - it started out with a cupcake made out of flowers, but didn't love it so I switched to the bouquet above. But I did like the idea so I thought I would try it with a new color combo. I love Navy and Gray together, so using the techniques above, I applied them to the Balmy Blue gingham paper. I carefully stamped the cupcake paper from the Hello Cupcake set without the trailing shadow. Added a mound of little icing flowers and filled in the blanks with some rhinestones. I added some Silver Glimmer Paper to add some more sparkle - it is for a birthday!!!! Itty Bitty Birthday sentiment and the Navy Gingham check ribbon were the perfect finishing touches.


I knew I wanted more of an allover pattern to the gingham and purple is great for Easter - so I pulled out the Hold on to Hope set & stamped the Heather Highland small gingham with Heather Highland ink & the spray from Hold on to Hope. The cross background is cut from silver glimmer paper & the cross itself is die cut from Blackberry Bliss (even though this picture looks like Elegant Eggplant). The Bunny & sentiment is also stamped with Blackberry Bliss. The bunny from A Good Day set is hand fussy cut and the ears are shaded with a little pink and the purple bow colored with Stampin' Write markers. The background is embossed with Pinewood Planks. Everything is popped up and the cross has a little bow made with the 1/8" Sheer Ribbon.


I really struggled with the background of this card because I knew I wanted to go even more allover. I started with the new Crackle stamp, but it was too much, I had pulled out Handwritten and Marbled, but they weren't singing to me. Then I found the Post Script set - and I love this stamp but have never see a great way to use it & decided to go for it. The result of stamping Lemon Lime Twist on the Lemon Lime gingham was not so overly apparent - it kind of disappears, but decided to plow forward.

Since this was now "postmarked", I decided to make it an across the miles type of card. I found the perfect sentiment in the Abstract Impressions set which now meant I needed flowers on the card. I played with several flower versions from Abstract Impressions but the more I worked with the card, the more I thought of my friend Kim in Seattle (where I just moved from) who loves Green & it is now the beginning of Tulip season, so I started custom creating this for her.

The tulips are from the Beautiful Bouquet set and the little heart in one of the bouquets is from Coffee Cafe. Tulips are stamped with Lemon Lime Twist, Garden Green and Crumb Cake. The little heart is done in Granny Apple Green. The mats are in Soft Suede and the ribbon is the 3/8" Classic Weave Ribbon. The background is sponge inked with Lemon Lime Twist and also edged with Garden Green and then everything is popped up with Dimensionals.

PS - I am not retiring Lemon Lime Twist at the end of the SU year - it will be in my arsenal forever! We need to petition SU to bring it back for another 2 years as a 2019-2021 In Color!


Here is the collection of cards made with the altered small gingham check from the Gingham Gala 6x6 paper pack. Ha - I just noticed the top 3 cards all have titled elements and the bottom ones are straight! 


Here are some other alternates / works in progress from above.


Shop Stampin' Up! products here!